Usage Guide
This document provides detailed instructions on how to use this panel. If you have any questions, please join the group for assistance from administrators: https://t.me/oneclickvirt
User Management
After logging into the administrator interface, open the user management page and you must click reset password to ensure the admin account password is a strong password, preventing malicious brute force attacks. If you defined your own password during initialization, you may skip resetting the password.
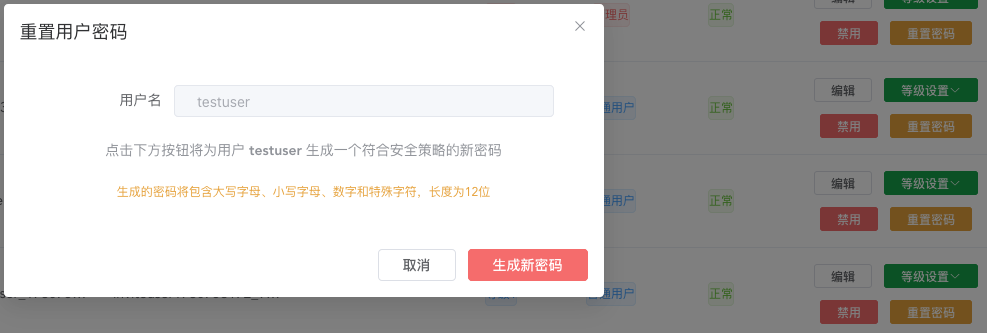
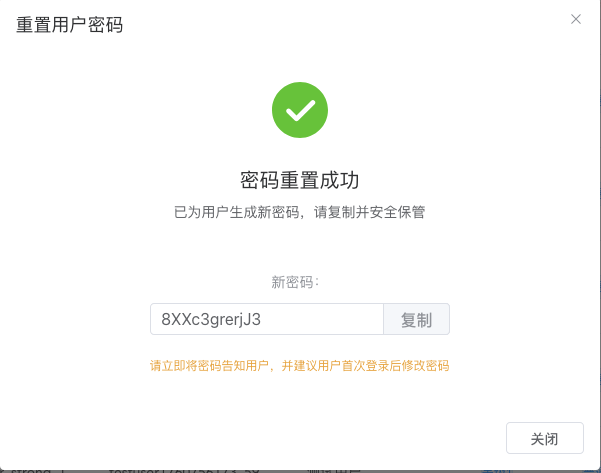
Resetting the password will automatically generate a strong password, which is displayed only once. Be sure to copy and save it to avoid forgetting it.
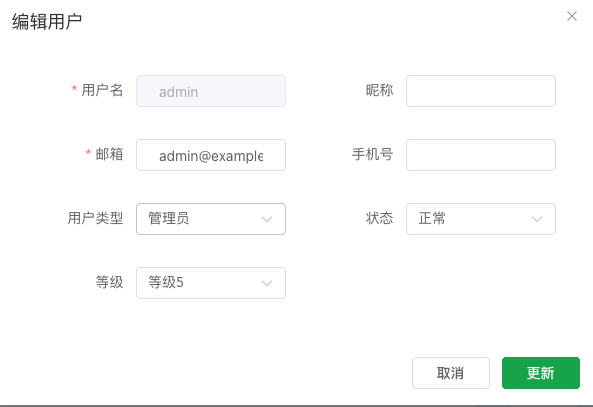
If you need to change a user's type, click on the corresponding user to edit. The edit popup supports changing the user type.

Administrators can click on the avatar in the upper right corner, where the dropdown menu has a button to switch between administrator and regular user views. If you need to test any features, you can directly use the administrator user for testing. (Regular users do not have this view switching button)
Managing Nodes
Before adding a node, make sure at least one supported virtualization stack is already installed on that node.
From the panel host, test connectivity to the node IP first. A latency below 300 ms with low packet loss is recommended. Otherwise, SSH/API operations may fail intermittently.
The setup process below is divided into required and optional sections. Complete all required sections first, then apply optional settings as needed.
Basic Information (Required)
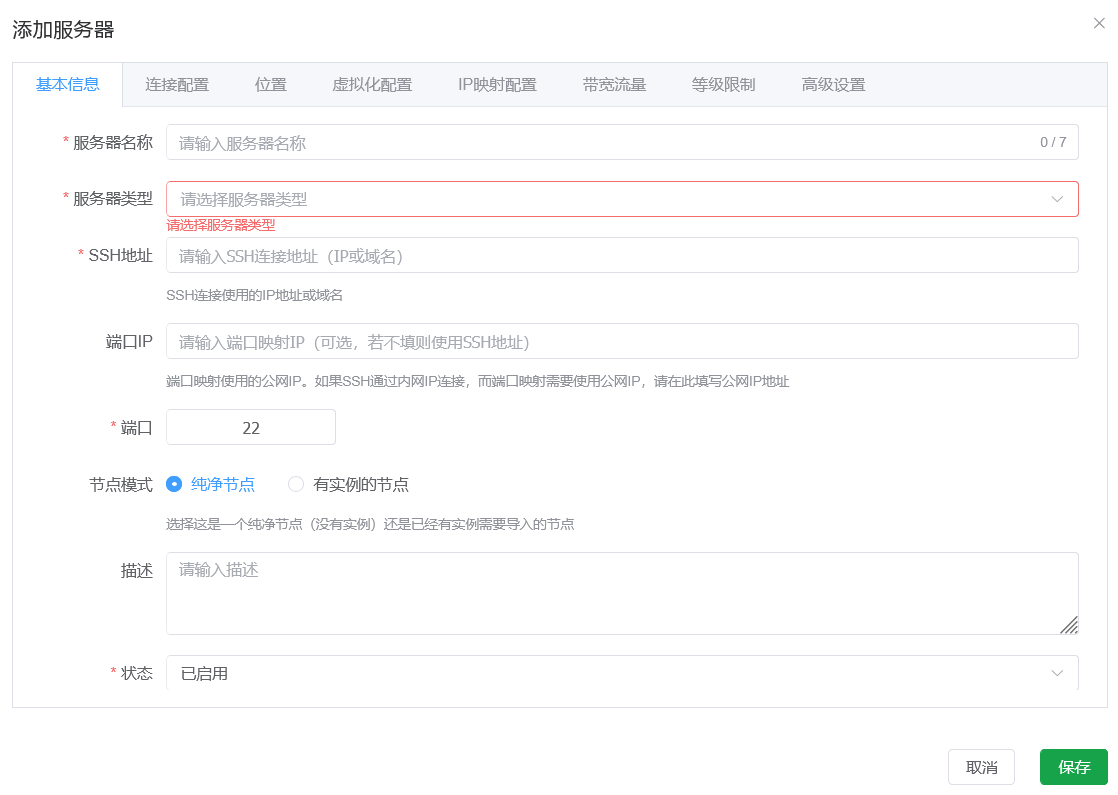
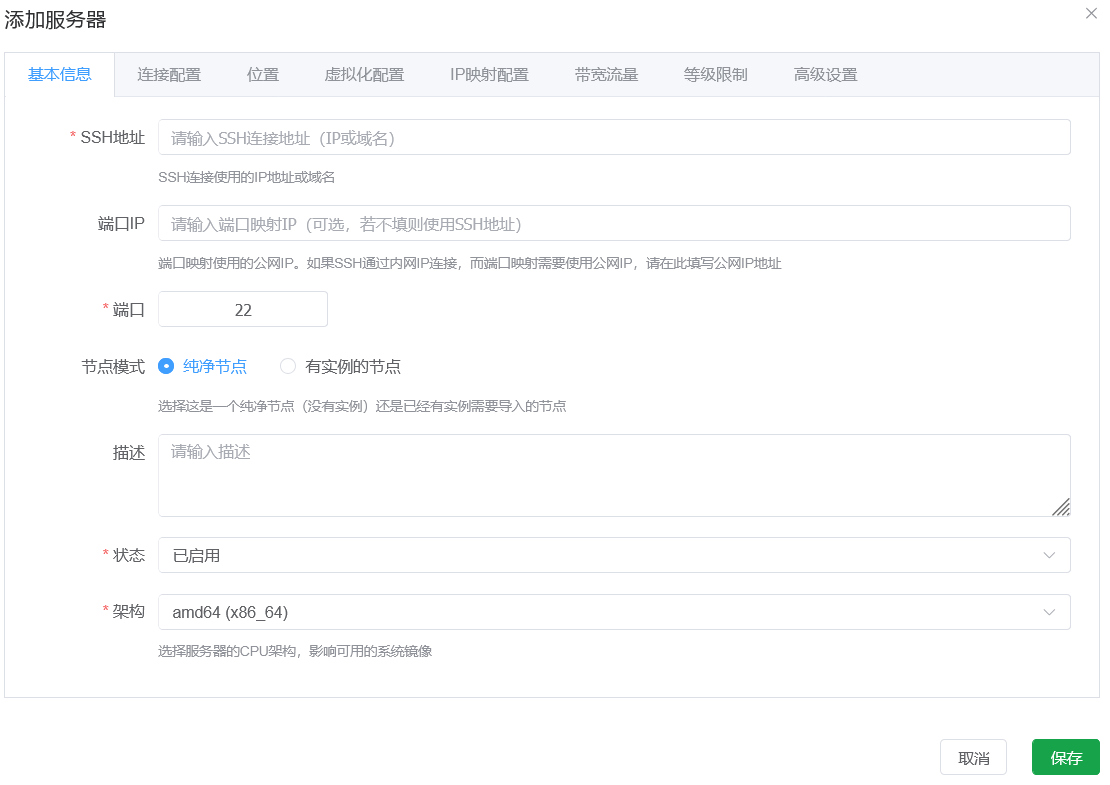
Use only letters and numbers for the server name, avoid special characters, and keep it short (recommended within 6 characters). This name is used as the default prefix when new instances are created.
For server type, select the virtualization technology that is actually installed on the node. Docker nodes create containers only by default; other types can create virtual machines.
For SSH address, enter the node's public IPv4 address or reachable private SSH address. This value is used for both SSH and API access.
For NAT port mapping, port IP has higher priority. If port IP is empty, the SSH address IP is used. Neither field must be a public IPv4 address.
Node mode can be either a clean node or a node with existing instances. For existing-instance mode, the system detects current instances automatically and generates redemption codes in Redemption Code Management. They are bound to the current admin by default and become visible in regular-user view.
In the port field, fill in the port for SSH connection to the node.
Description is optional metadata for admins only.
Status is enabled by default. After health check passes, regular users can apply for and claim instances.
Architecture must match the node architecture. Currently supported: amd64 and arm64.
(Management for nodes that already contain instances is still limited. Full synchronization and unified management for pre-existing instances is not fully implemented yet.)
Connection Configuration (Required)

Using the root account is recommended because automatic API setup installs required dependencies. Non-root accounts may hit permission issues.
Password is the SSH login password. Key-based login is also supported.
SSH timeout values are used for connectivity probing and fault tolerance tuning.
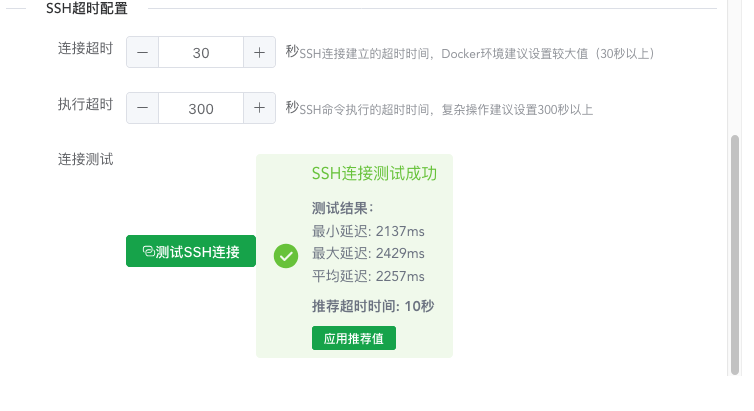
After filling the fields above, click Test to get recommended values, then click Apply if you want to use them.
The latency displayed here reflects command execution round-trip time, not just ICMP ping, so values around 2 seconds can still be normal.
These settings are designed to support nodes with unstable links to the panel host. Higher values mean higher fault tolerance.
Execution timeout generally doesn't need modification unless your node's performance is particularly weak and command execution takes a long time.
Location Information (Optional)
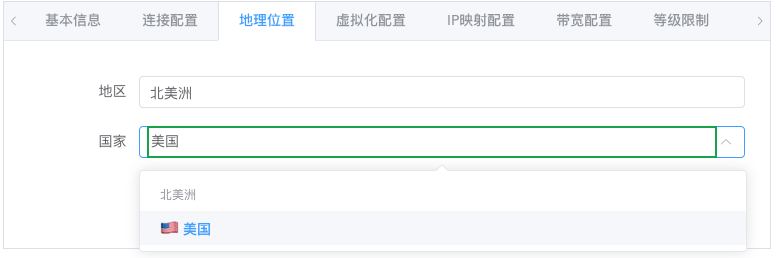
Directly enter a specific country and click to select. Most countries already have presets with corresponding flag icons.
After setting the location, regular users will be able to see the corresponding flag and region in the application interface, along with the automatically matched continent.
You can optionally fill in the corresponding city. Not filling it in is fine and doesn't affect usage.
Instance Type and Quantity Limits (Required)
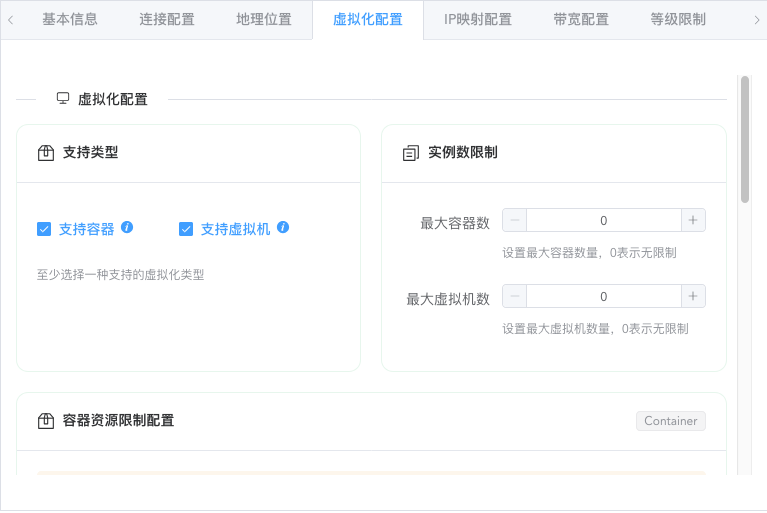
For docker type nodes, only containers can be created. Other virtualization types support creating both containers and virtual machines (provided the node itself supports it; forced creation on unsupported nodes will automatically fail).
If you don't need to create virtual machines, be sure to uncheck the virtual machine option.
If the quantity limit maintains the default parameter of 0, it means no node-level quantity limit for this type of instance.
For container type, it's recommended to set the quantity according to the following formula:
Node free storage disk size / Minimum disk size of instances to be distributed = Maximum number of instances
For virtual machine type:
Node free memory size (including virtual memory) / Minimum memory size of instances to be distributed = Number of instances
The reason for this calculation is that containers generally don't limit total CPU quantity and memory size, but limit disk size, while memory is usually the bottleneck for the number of virtual machines that can be created.
If you need to overcommit, the values obtained from the above calculation rules can be appropriately increased, and the following configuration should be set up.
Resource Overcommitment Configuration (Optional)
Overcommitment resource configuration means whether to strictly limit corresponding resources. Removing limits means no checks will be performed and forced creation may occur, which may lead to creation task failures.
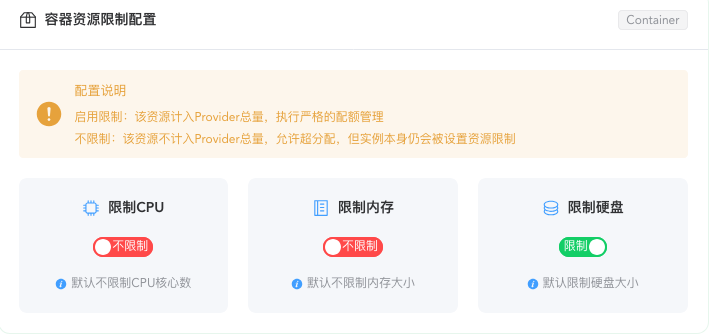
By default, container type doesn't limit total CPU and memory pre-allocation, but limits total pre-allocated disk capacity to achieve optimal resource sharing and maximum number of instances. Generally doesn't need modification.
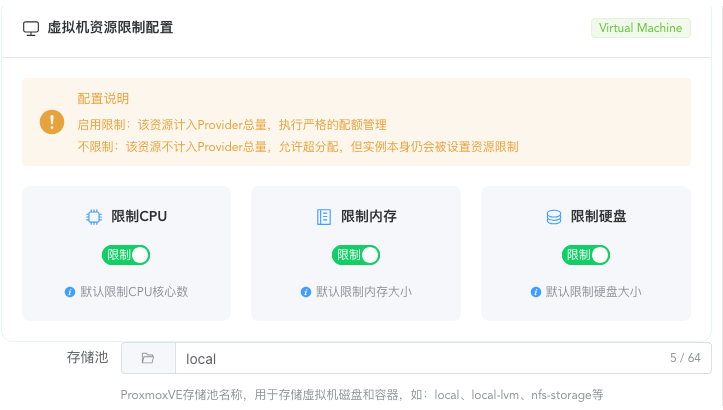
By default, virtual machine type limits all resources, with the maximum total pre-allocated resources not exceeding actual resource size.
For ProxmoxVE, there's also a storage pool name setting for the disk to be created. If it's a multi-disk PVE, you need to set which storage pool to create on.
Other types of virtualization environments have asked about the specific storage pool creation location during installation, so there's no need to set it.
In general, if you need to limit which resources cannot be overcommitted, click limit. After limiting, corresponding resources cannot be overcommitted; without limiting, corresponding resources can be overcommitted.
The limit here is for the total resource usage of this type of instance on this node, used to calculate available resources and limit instance creation.
Not recommended to modify unless you know what this setting does.
IP Mapping Configuration (Optional)
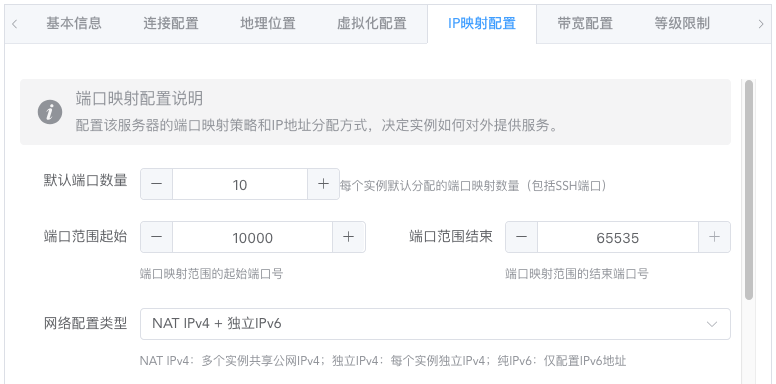
Generally doesn't need modification. Here you can set the number of port mappings, range, network configuration method, and port mapping method for each instance.
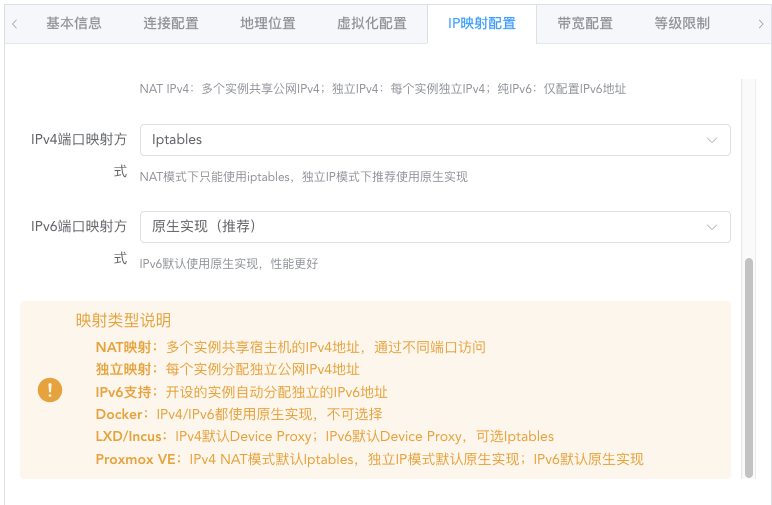
By default, instances are created with NAT-mapped public IPv4 ports. The priority of mapped IPs is: Port IP > SSH connection IP (used when port IP is not set)
If the node itself has an IPv6 subnet greater than or equal to /80 in size, change the network configuration to create instances with independent public IPv6 addresses.
Extremely, you can also create instances with only independent IPv6 addresses. Make your own choice.
Not recommended to modify the mapping method unless you know what this setting does. The default configuration is already the best configuration.
Bandwidth and Traffic Configuration (Required)
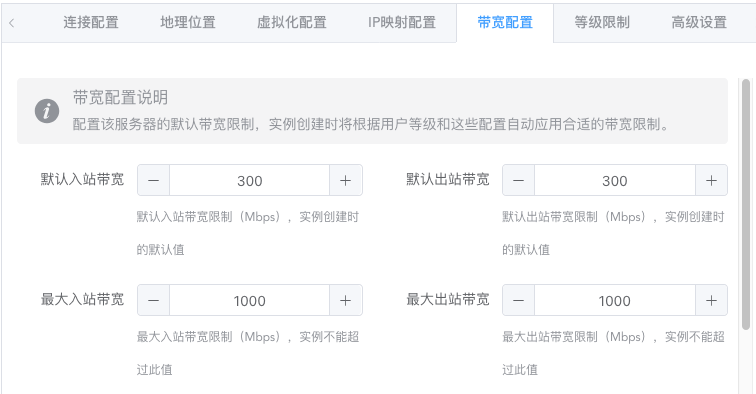

Simply put, this sets the maximum bandwidth for instances created on the node and the total available traffic quota. Traffic monitoring and traffic statistics are not enabled by default. The traffic cycle follows the natural month by default and resets on the 1st day of each month. You can also choose a monthly reset day in the Expiry Settings section later; if 29, 30, or 31 is selected, shorter months automatically use the last day of that month.
agent (Recommended)
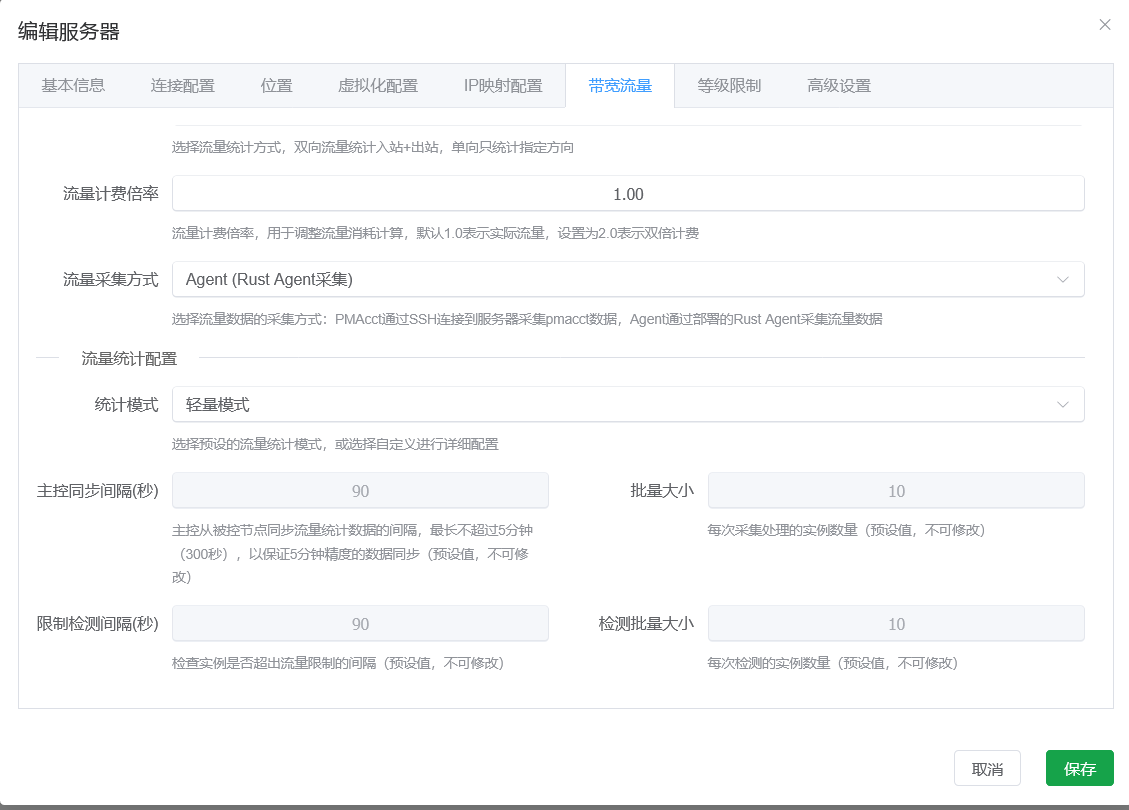
A traffic and resource statistics project built with Rust. After enabling traffic monitoring and selecting agent monitoring, choose Deploy in the monitoring management page.
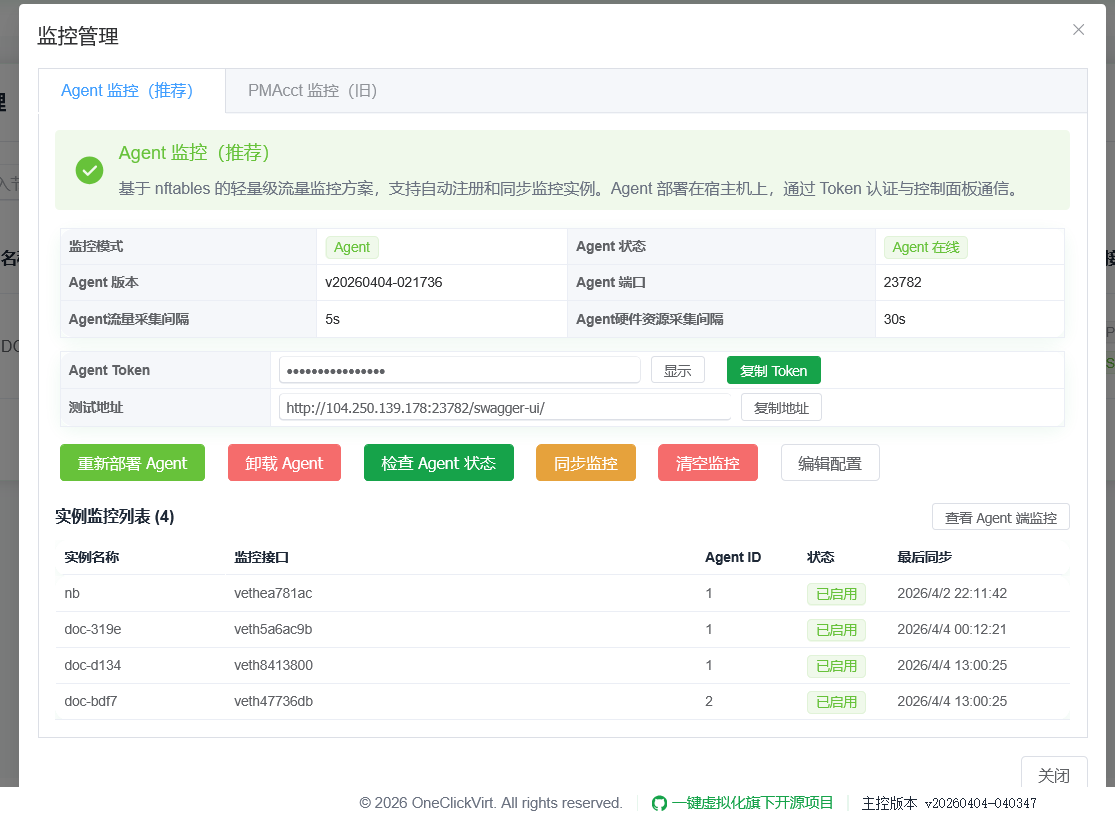
After deployment completes, click Detect Agent Status to check whether it loaded successfully.
This method is suitable for nodes running a Linux kernel and supporting iptables or nftables. By default it uses nftables for monitoring. If you need custom iptables monitoring or want to exclude traffic for a specific inbound or outbound IP from monitoring, you need to click Edit Configuration in the current popup and then save and synchronize monitoring before the configuration is actually applied.
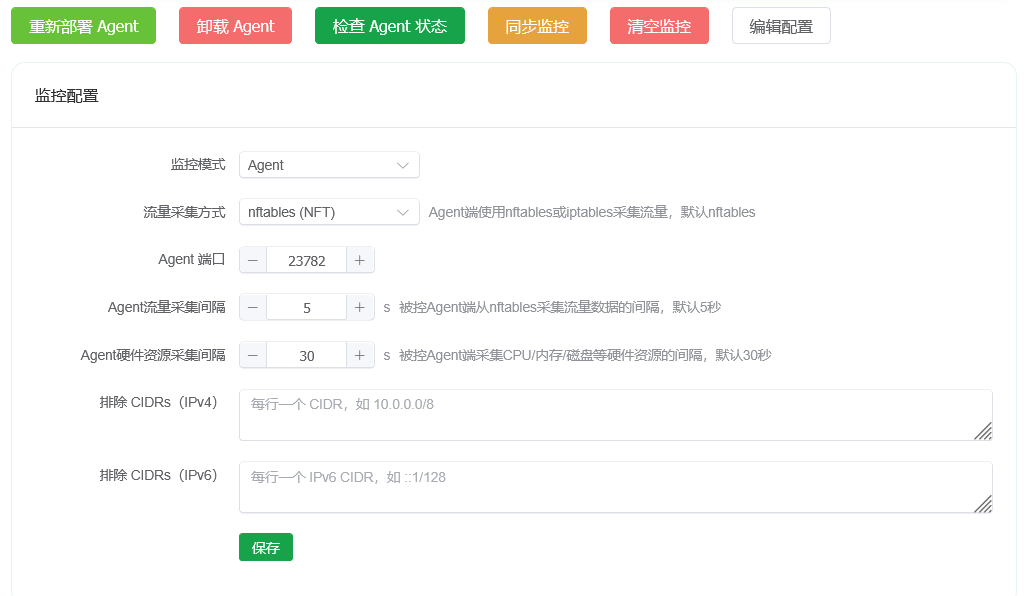
Generally, custom configuration is not needed. The default configuration is sufficient for daily use.
pmacct (Not Recommended)
This method is for nodes that do not support nftables or iptables commands, such as Alpine hosts or non-Linux kernels. In those cases only, use this traffic monitoring method. In other scenarios, agent mode is still recommended.
Enabling pmacct traffic monitoring creates a memory burden because traffic statistics data must be cached. Even after this project is heavily optimized, memory usage still grows with bandwidth, so do not enable traffic statistics if you do not have enough memory.
If traffic statistics are enabled, pay attention to the statistics mode. The default mode is the most universal. If your local performance is good enough, mainly with sufficient memory, you can choose a higher collection frequency and quantity. If performance is very poor, it is recommended to choose the last tier. Custom parameters are supported as well, but beginners should not modify them; the preset modes are sufficient.
If traffic statistics are enabled, note that the bandwidth assigned per level should not be too large. Monitoring will dynamically generate configuration files based on the assigned bandwidth. The larger the bandwidth, the more memory the monitor uses.
| Level | Instance Bandwidth | plugin_pipe_size | sql_cache_entries | Base Usage | Burst Usage |
|---|---|---|---|---|---|
| Low | ≤50 Mbps | 2 MB | 32 | 5~8 MB | 8~12 MB |
| Medium-Low | 51~100 Mbps | 10 MB | 64 | 10~15 MB | 15~30 MB |
| Medium | 101~200 Mbps | 25 MB | 128 | 15~20 MB | 30~50 MB |
| Medium-High | 201~500 Mbps | 50 MB | 256 | 20~30 MB | 50~80 MB |
| High | 501~1000 Mbps | 128 MB | 512 | 30~50 MB | 80~150 MB |
| Very High | 1001~2000 Mbps | 256 MB | 768 | 50~80 MB | 150~300 MB |
| Extremely High | >2000 Mbps | 512 MB | 1024 | 80~120 MB | 300~600 MB |
Traffic statistics error margin is about 0.1G deviation per 10G. NAT mapping and instances with independent IPv6 IPs are automatically handled, no manual management needed.
However, if traffic statistics were previously enabled and need to be disabled and monitoring uninstalled later, you need to delete the monitoring in the following place first before disabling traffic statistics. This ensures complete uninstallation, otherwise it will still collect statistics in the background.
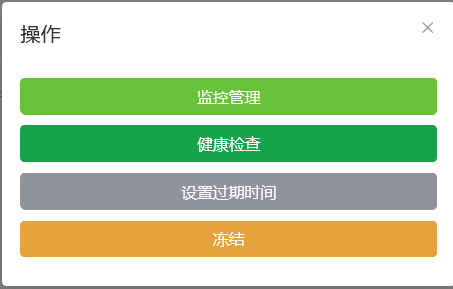
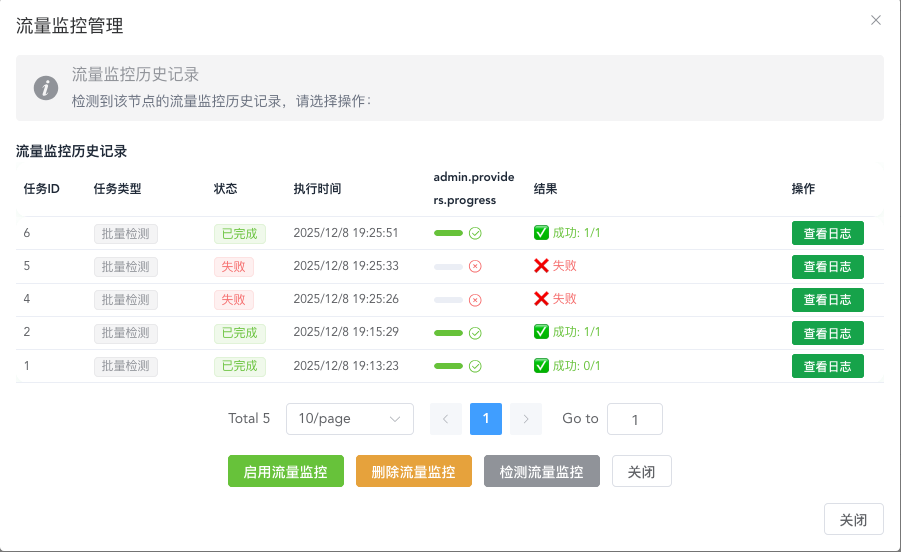
Only after enabling traffic control will the traffic monitoring management button appear here. After entering, three buttons are visible, mainly for manually synchronizing monitoring situations. Generally, if traffic monitoring is not enabled after some instances are created, manual management is not needed. If needed, just click detect traffic monitoring, which will batch detect the monitoring situation of all instances under the current instance.
The traffic reset day affects current-cycle statistics, user/instance/provider traffic limit checks, and recovery queueing for instances automatically stopped because of traffic overuse. When a provider reaches its reset day, the system first clears that provider's traffic-limit state, then recalculates user and instance limits. Instances that are no longer over the limit and have no other freeze reason will automatically receive a start task.
Level Restrictions (Required)
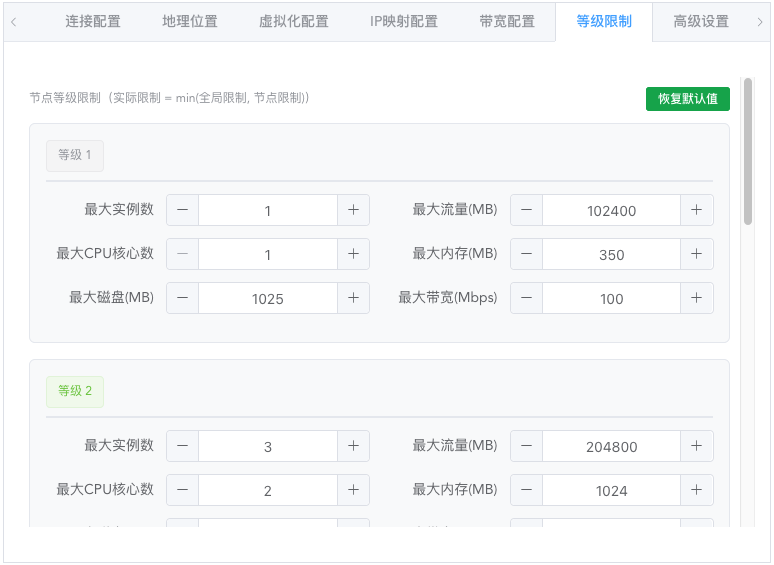
Five levels are preset here, and users will be filtered through this restriction configuration when applying and claiming.
During the actual instance creation process, the node-level level restrictions will be compared with the global user level resource restrictions, taking the minimum value as the user's available resource limit on the current node.
This setting is to specialize the configuration limits of instances that users of corresponding levels can create on the current node, avoiding situations where global limits are not suitable for the current node. Global limits can be set in system configuration and are generally used for user account-level resource usage restrictions.
Expiry Settings (Optional)
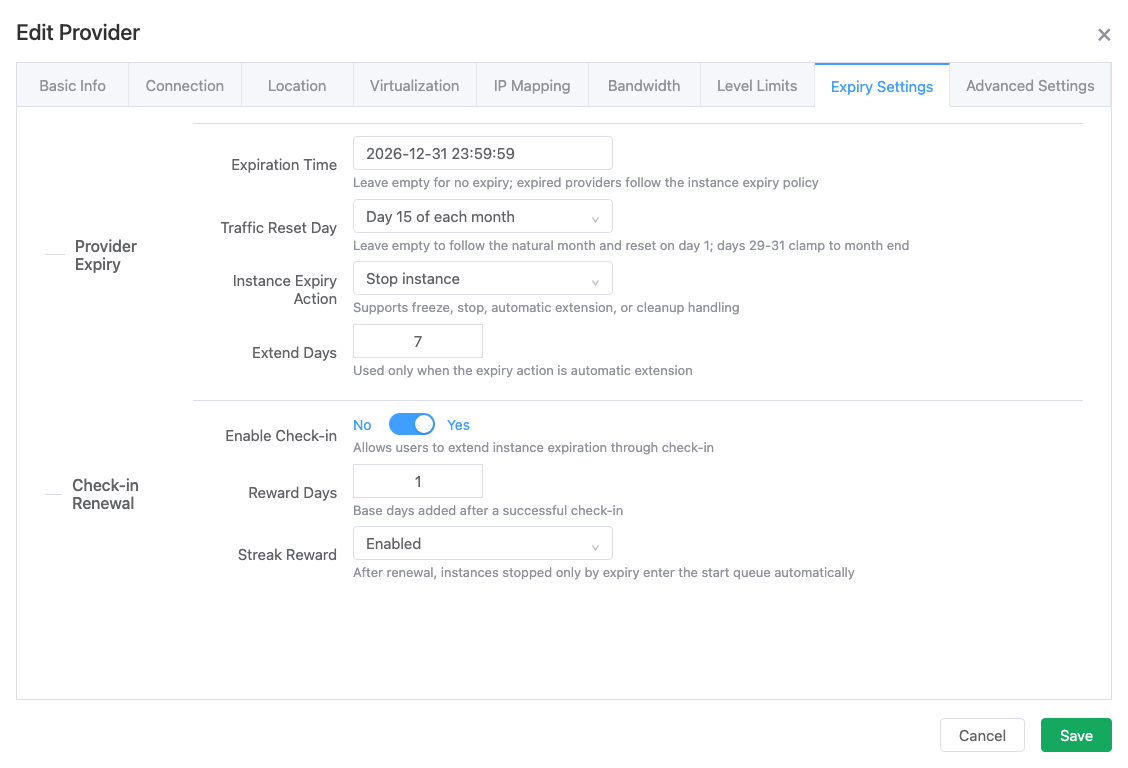
Expiration time:
Prevents users from continuing to operate expired nodes. Expired nodes will be automatically frozen, at which time corresponding instances will not allow any operations but will not be automatically deleted. If a node is frozen, please clean and delete it in time.
Traffic reset day:
Leave it empty to follow the natural month, which starts a new traffic cycle on the 1st day of each month. You can also set any day from 1 to 31. The system calculates the current cycle, next reset time, and traffic-overlimit recovery separately for each provider.
Instance expiration handling:
When an instance expires, it can be frozen, stopped, automatically extended, or left for cleanup according to the provider setting. If an instance was automatically stopped because it expired, a successful check-in renewal creates a start task automatically, so the administrator does not need to start it manually.
Check-in renewal:
The previous check-in renewal tab has been merged into Expiry Settings. Configure check-in availability, renewal days, consecutive check-in rewards, and related limits here. After a successful check-in extends the expiration time, the system also clears the freeze caused by expiration. If the instance was stopped only because of expiration, it enters the start queue automatically.
Advanced Settings (Optional)
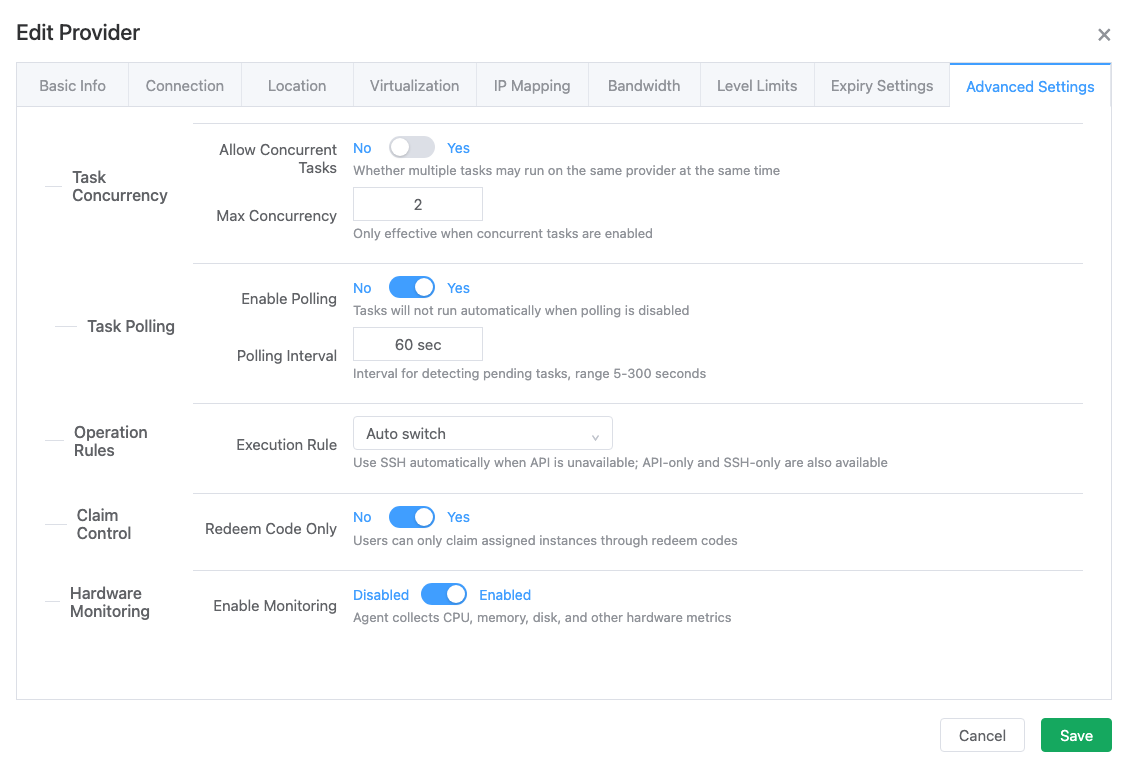
Task concurrency control:
Default is single-threaded serial execution. At the same time, only one add/delete/modify task (corresponding to instance creation, deletion, and reset operations) will exist.
Can be changed to multi-threaded concurrent execution, where multiple add/delete/modify tasks can exist at the same time. Only when concurrent execution is used does the concurrency number setting make sense.
Serial execution is suitable for situations where the node itself has weak performance or the platform has few users. Concurrent operation is suitable for situations where the node itself has strong performance or there are many users. Please choose the mode yourself.
Personally recommend using default settings. Concurrent execution may have boundary conditions that have not been fully tested and may have bugs.
Task polling settings:
Controls whether to enable task execution and the interval for polling to check status. Generally keep default.
Operation execution rules:
Node operation mode supports API only, SSH only, and automatic switching. By default, automatic switching mode is used. Generally, there's no need to modify unless there are special requirements.
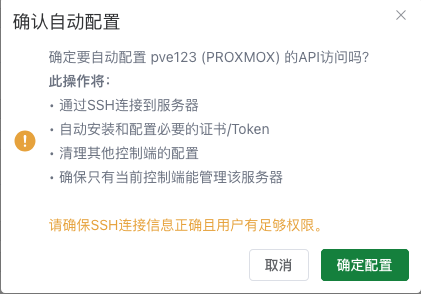
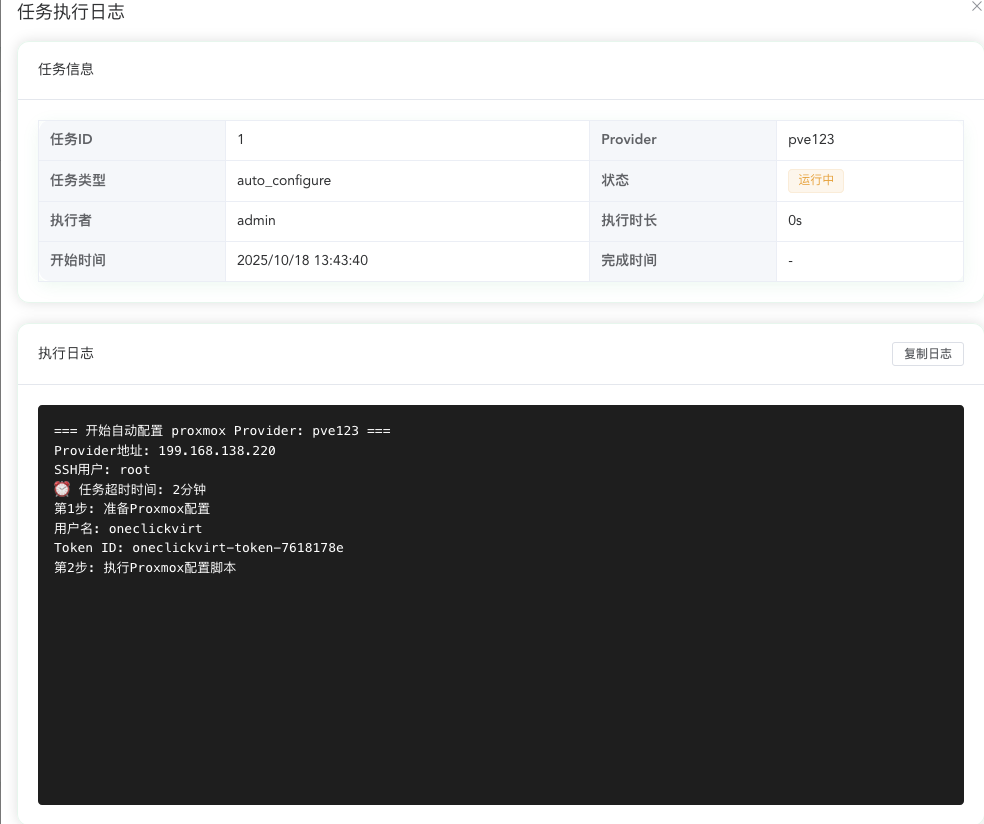
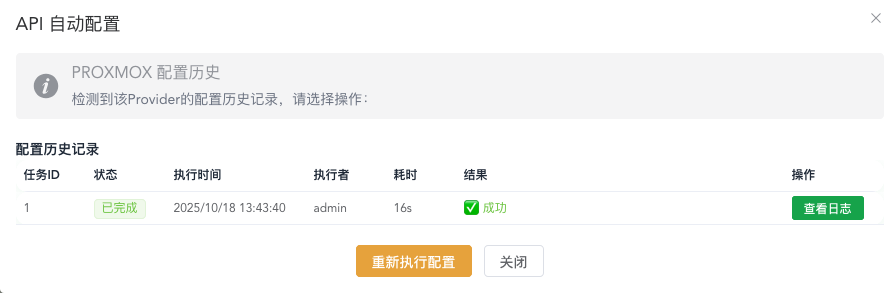
If you need to enable API operation mode, after successfully saving the node settings, click the auto-configure API button outside to execute background tasks to automatically interface with the virtualization platform API, no manual configuration required. After waiting for about 15-20 seconds, it should have been configured successfully. Click the button to see the configuration history tasks and corresponding logs. After successful configuration, click health check again to ensure the API status is green online status, and you've successfully configured and enabled the API.
Application and Claim Control:
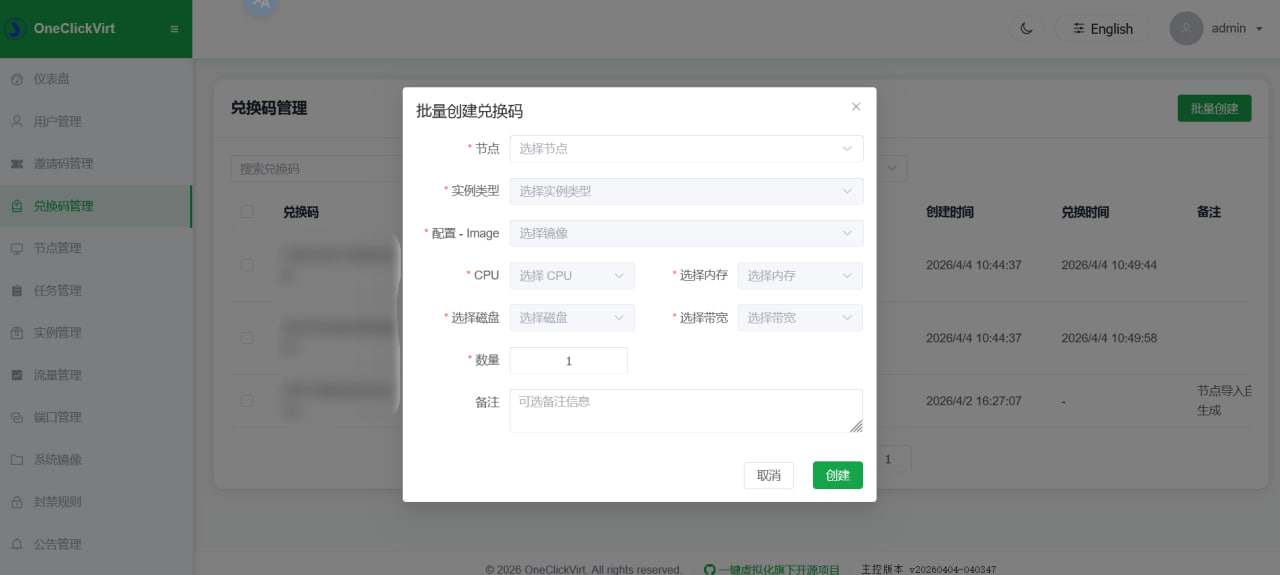
By default, regular users can choose the system and create instances using configurations within their level. If you enable redemption-code-only claiming, you need to batch-generate redemption codes in Redemption Code Management after the corresponding instances are generated, and then distribute the codes to users for redemption. In short, only enable this feature if you need to batch-create instances or revoke regular users' ability to freely choose the system and configuration.

Hardware Monitoring:
If you want to enable this feature, you must also enable agent monitoring in Monitoring Management. Without deploying the corresponding agent monitoring, hardware monitoring cannot be used. The collection interval and related parameters can be customized on the configuration edit page in Monitoring Management.
By default, the system monitors CPU, memory, and disk usage for instances over the last 24 hours, and only keeps 24 hours of data.
Hardware Configuration (Optional)

Only lxd and incus support setting default instance parameter configurations. Generally use the defaults unless you need to manually limit certain special hardware resources; otherwise, generally no modification is needed.
If you need to set the maximum percentage of CPU usage or similar parameters, the settings here can meet your requirements.
Health Check (Required)

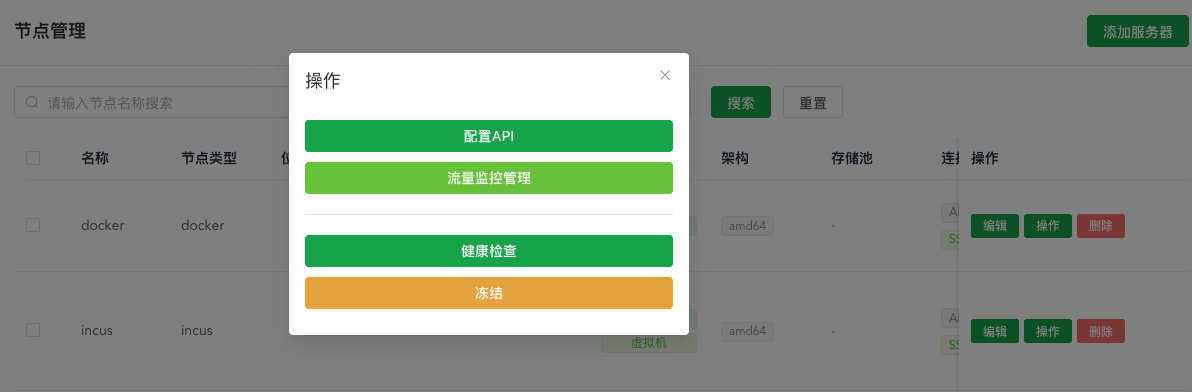
Click the operation button

After saving the node, after completing the health check, regular users can see the corresponding server and can apply for creation. If health check is not performed, users cannot apply for creation and claiming.
After health check, it will display whether the corresponding type of connection status is online and will automatically detect the actual total resources of the entire machine. This total resource amount is the total resource limit for non-overcommitted creation set above.
Whether the API is available does not affect specific usage. Auto-configuring the API is not mandatory.
System Images
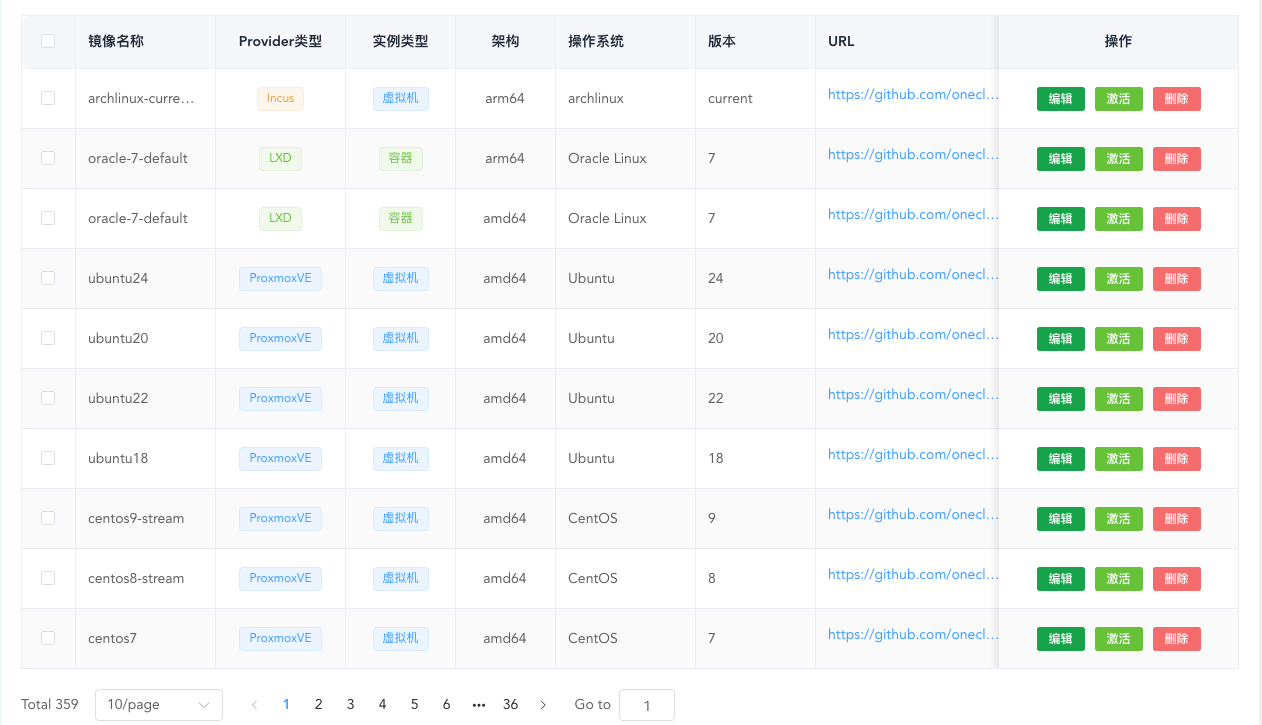
By default, seed data will include all available images for all virtualization environments. By default, only alpine and debian images are enabled to avoid too many available images for users.
If you need images for any system, any virtualization environment, any architecture, please search and enable them yourself, otherwise users cannot select the corresponding images.
Custom image addresses are temporarily not supported. The current frontend entry function is not available. Do not manually enter images.
Port Management
Administrators can inspect and maintain port mapping records under Resources > Port Management. Node-side mappings are applied by the corresponding virtualization node. Controller forwarding is intended for tunnel access when a node has no public ingress and currently supports one TCP port per record.
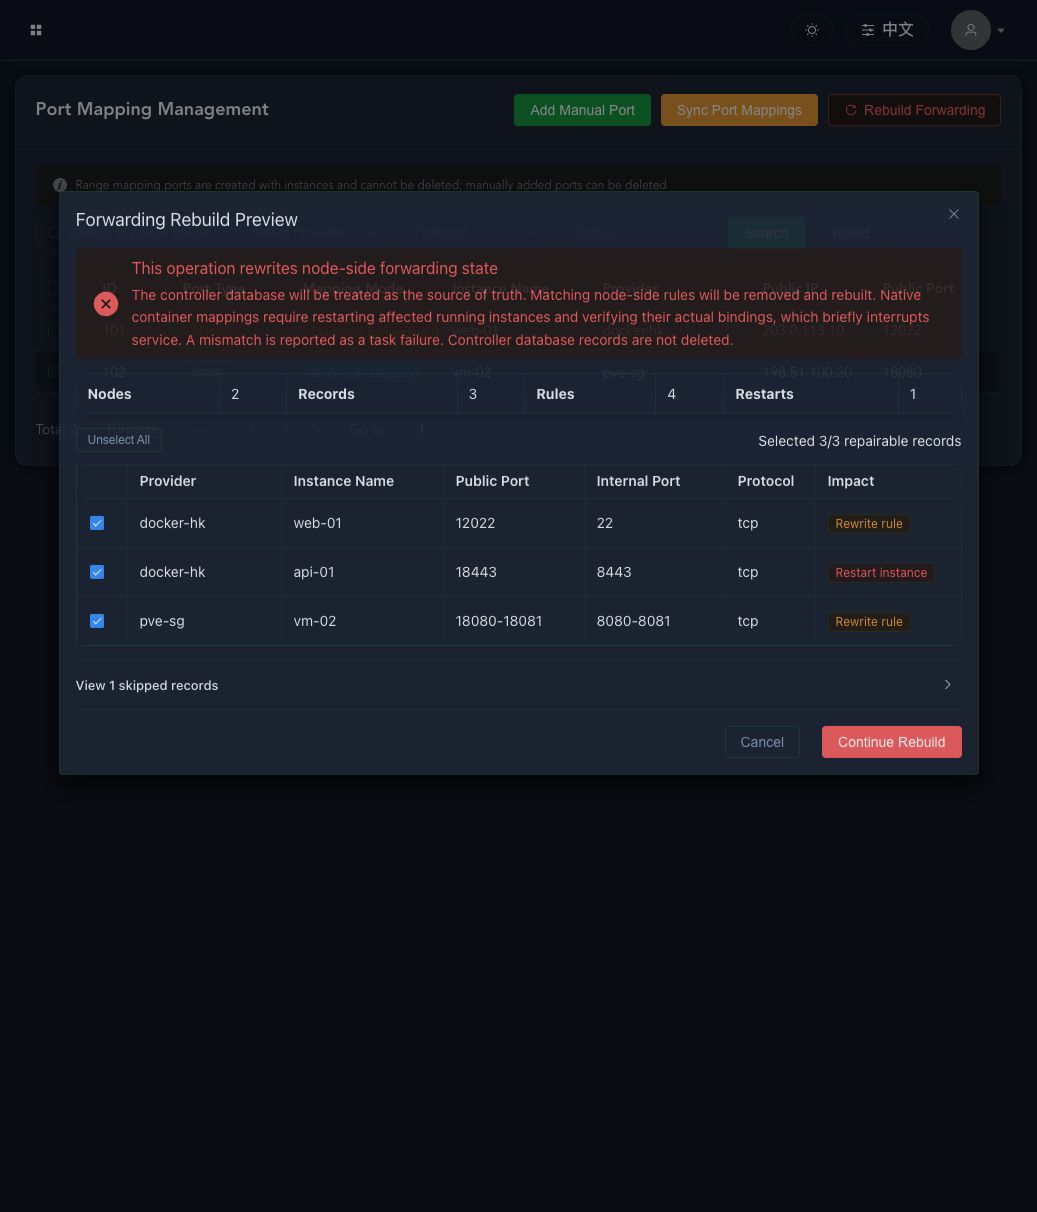
Sync Port Mappings previews and removes stale database records, such as mappings whose instances no longer exist. Rebuild Forwarding repairs the opposite direction: selected controller database records are reapplied to the node or controller. The preview separates repairable, restart-required, and skipped records. Execution requires a risk confirmation followed by entering REBUILD exactly.
Native container runtime bindings require restarting affected running instances, which causes a brief interruption. The task verifies the actual bindings after restart and reports a clear failure when they do not match the database. This operation does not delete controller database port mapping records.
System Configuration
General options here won't be elaborated on. There are two configurations that need special explanation.
User Level Configuration (Required)
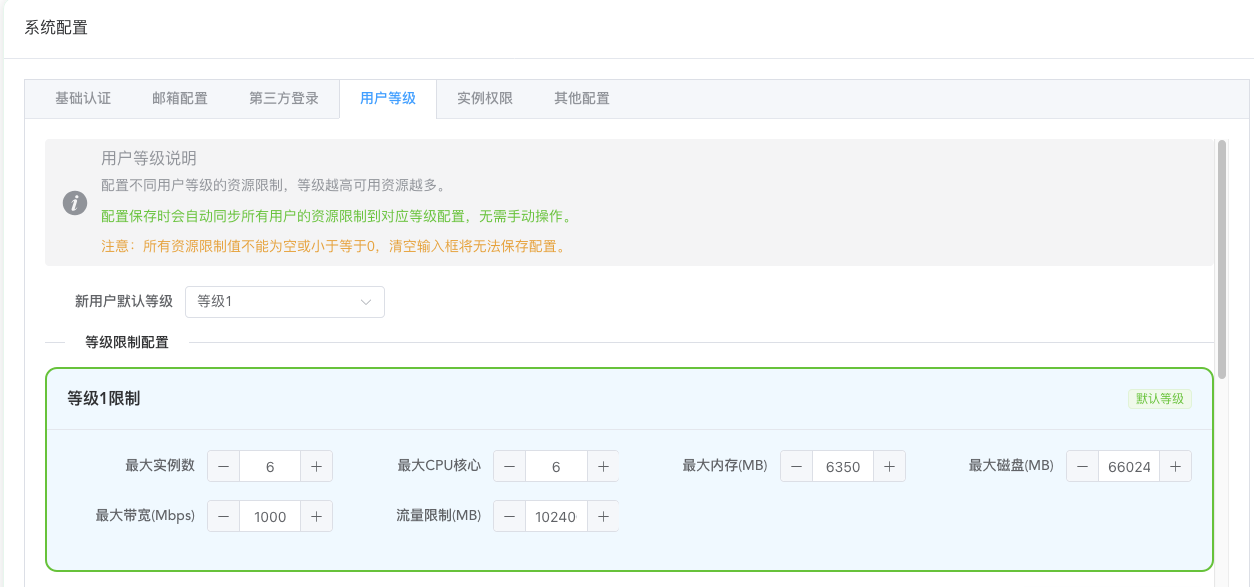
This limits the total account available resources for regular user levels.
When creating instances on corresponding nodes, this global configuration will work together with the node's own level configuration to filter and provide users with configurations that meet both conditions.
Instance Permission Configuration (Required)
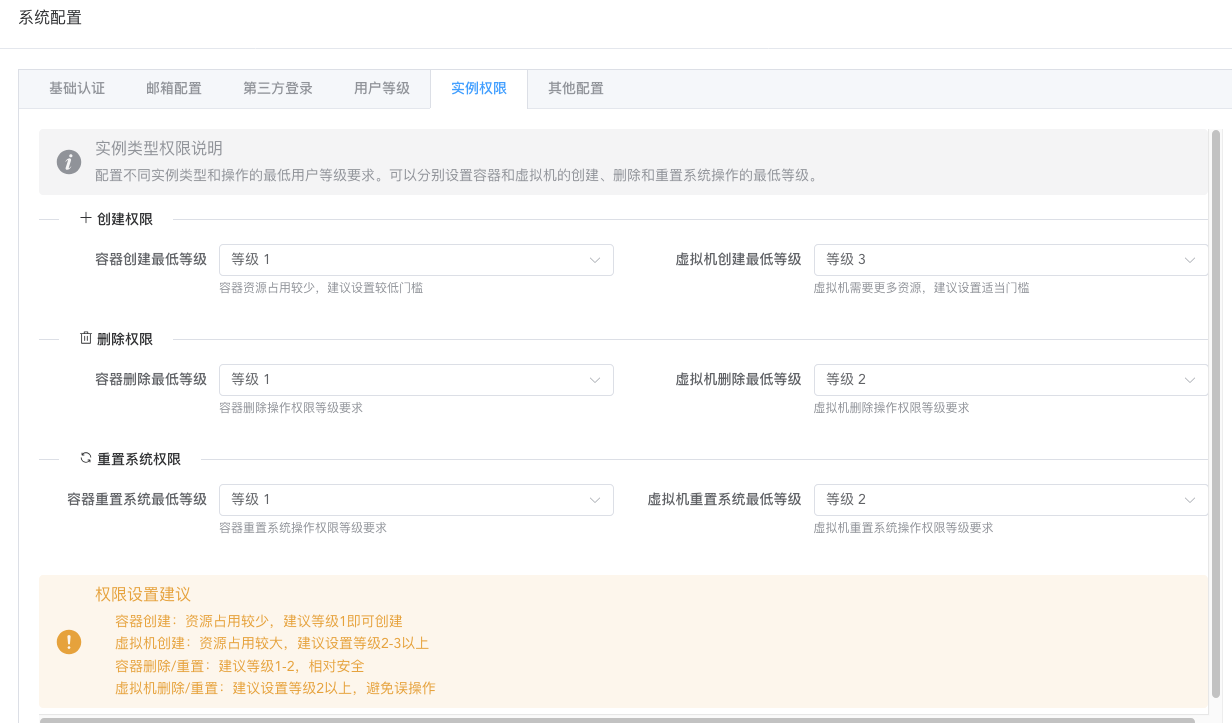
Here you can control the minimum level required for users to perform sensitive operations. You can control the minimum user level required for instance creation, instance deletion, and instance system reset.
Configuration File
The default system configuration is already sufficient for light usage. If advanced customization is needed, you need to modify the configuration file or modify it in the administrator interface after initialization.
https://github.com/oneclickvirt/oneclickvirt/blob/main/server/config.yaml
This is the complete initialization configuration file. Below we will explain the specific configuration items:
auth Authentication Configuration
auth:
    email-password: ""
    email-smtp-host: ""
    email-smtp-port: "3306"
    email-username: root
    enable-email: false
    enable-oauth2: false
    enable-public-registration: false
    enable-qq: false
    enable-telegram: false
    qq-app-id: ""
    qq-app-key: ""
    telegram-bot-token: ""
frontend-url: ""Authentication module configuration items, used to control user login and registration methods and third-party login integration.
email-password: Email service authentication password, used for authentication when sending emails via SMTPemail-smtp-host: SMTP server address, such assmtp.gmail.comemail-smtp-port: SMTP server port, common ports are25,465(SSL),587(TLS)email-username: SMTP server login username, usually the complete email addressenable-email: Whether to enable email login functionalityenable-oauth2: Whether to enable OAuth2 third-party login functionalityenable-public-registration: Whether to allow public registration. When disabled, only administrators can create accountsenable-qq: Whether to enable QQ loginenable-telegram: Whether to enable Telegram loginqq-app-id: App ID applied for on QQ Connect platformqq-app-key: App Key applied for on QQ Connect platformtelegram-bot-token: Telegram Bot's API Tokenfrontend-url: Frontend access address, needs to include protocol header (http://orhttps://), trailing slash is optional. OAuth2 callback address depends on this configuration
captcha Verification Code Configuration
captcha:
    enabled: true
    expire-time: 300
    height: 40
    length: 4
width: 120Graphic verification code generation and verification configuration, used for security verification on frontend login and registration pages.
enabled: Whether to enable verification code functionalityexpire-time: Verification code expiration time in secondsheight: Verification code image height in pixelslength: Verification code character lengthwidth: Verification code image width in pixels
mysql Database Configuration
mysql:
    auto-create: true
    config: charset=utf8mb4&parseTime=True&loc=Local
    db-name: oneclickvirt
    engine: InnoDB
    log-mode: error
    log-zap: false
    max-idle-conns: 10
    max-lifetime: 3600
    max-open-conns: 100
    password: ""
    path: ""
    port: ""
    prefix: ""
    singular: false
username: rootMySQL database connection and behavior configuration. Initialization judgment logic: when both path and port are empty, the system considers initialization is needed, and at this time the target database must be an empty database.
auto-create: Whether to automatically create the database (if it doesn't exist)config: Database connection parameters, including character set, time parsing, etc.db-name: Database nameengine: Database storage engine, InnoDB is recommendedlog-mode: Database log mode, options aresilent,error,warn,infolog-zap: Whether to use zap log library to record database logsmax-idle-conns: Maximum number of idle connectionsmax-lifetime: Connection maximum lifetime in secondsmax-open-conns: Maximum number of open connectionspassword: Database passwordpath: Database server addressport: Database server portprefix: Database table name prefixsingular: Whether to use singular table names (default is plural)username: Database username
quota Quota Limit Configuration
quota:
    default-level: 1
    level-limits:
        "1":
            max-instances: 1
            max-resources:
                bandwidth: 100
                cpu: 1
                disk: 1025
                memory: 350
            max-traffic: 102400
        "2":
            max-instances: 3
            max-resources:
                bandwidth: 200
                cpu: 2
                disk: 20480
                memory: 1024
            max-traffic: 204800
        "3":
            max-instances: 5
            max-resources:
                bandwidth: 500
                cpu: 4
                disk: 40960
                memory: 2048
            max-traffic: 307200
        "4":
            max-instances: 10
            max-resources:
                bandwidth: 1000
                cpu: 8
                disk: 81920
                memory: 4096
            max-traffic: 409600
        "5":
            max-instances: 20
            max-resources:
                bandwidth: 2000
                cpu: 16
                disk: 163840
                memory: 8192
max-traffic: 512000User level and resource quota control configuration. The default unit for memory, disk, and traffic is MB.
Global Configuration
default-level: Default level for newly registered users
instance-type-permissions Instance Type Permissions
Controls what operation types users of different levels can perform.
min-level-for-container: Minimum user level required to create container instancesmin-level-for-delete: Minimum level required to perform delete operations on the regular user sidemin-level-for-vm: Minimum user level required to create virtual machine instances
level-limits Level Quota Limits
Defines the resource quota upper limits corresponding to each user level, with keys being level numbers.
Each level contains the following configurations:
max-instances: Maximum number of instances this level user can createmax-resources: Maximum resource limits for a single instancebandwidth: Maximum bandwidth in Mbpscpu: Maximum CPU coresdisk: Maximum disk space in MBmemory: Maximum memory in MB
max-traffic: Maximum total traffic for this level user in MB
zap Log Configuration
zap:
    compress-logs: true
    director: storage/logs
    encode-level: LowercaseLevelEncoder
    format: console
    level: info
    log-in-console: false
    max-array-elements: 5
    max-backups: 15
    max-file-size: 5
    max-log-length: 2000
    max-string-length: 1000
    prefix: '[oneclickvirt]'
    retention-day: 3
    show-line: false
stacktrace-key: stacktraceDetailed configuration for system log recording, based on the zap log library.
compress-logs: Whether to compress archived log filesdirector: Log file storage directoryencode-level: Log level encoding method, options areLowercaseLevelEncoder(lowercase),CapitalLevelEncoder(uppercase)format: Log output format, options areconsole(console format),json(JSON format)level: Log level, options aredebug,info,warn,error. It's recommended to usedebugduring development and debugging, andinfoorwarnin production environmentslog-in-console: Whether to output logs to console simultaneouslymax-array-elements: Maximum number of elements to record for array type fieldsmax-backups: Maximum number of historical log files to retainmax-file-size: Maximum size of a single log file in MBmax-log-length: Maximum length of a single log entry, excess will be truncatedmax-string-length: Maximum recording length for string fieldsprefix: Log prefix identifierretention-day: Log file retention days, automatically deleted after expirationshow-line: Whether to display the filename and line number of log callsstacktrace-key: Key name for stack trace information
Note: When debugging issues, level should be set to debug to obtain detailed log information.