Setting Up macOS Virtual Machine
Prerequisites
See the left sidebar section Configuration requirements for system and hardware prerequisites.
You can set up a macOS VM only when environment checks confirm nested KVM support on the host.
Setting Up the Prerequisites
- Automatically identify CPU type (AMD or Intel) and set nested virtualization parameters according to the type.
- Modify GRUB boot parameters to enable IOMMU and disable default framebuffer.
- Add VFIO module support for hardware device passthrough.
- Blacklist sound card and graphics card driver modules to avoid conflicts with macOS.
- Configure KVM-related kernel parameters, ignore MSR errors, and improve compatibility.
- Patch Proxmox frontend status detection logic to bypass status restrictions.
curl -L https://raw.githubusercontent.com/oneclickvirt/pve/main/extra_scripts/configure_macos.sh -o configure_macos.sh && chmod +x configure_macos.sh && bash configure_macos.shAfter successful execution, it will show that the system will restart in 15 seconds. This is the normal process, as kernel parameters cannot take effect without restarting.
System Image Download
- All images have pre-installed components and are relatively large (minimum about 4.9GB). Download and extraction tasks will run in the background.
- Images are complete systems with all components and can be booted and used without internet connection.
- If the free space on the system disk is less than twice the size of the image, the download will be rejected.
- Images are in 7z compressed format and need to be extracted before use.
- You can check the status of current download and extraction tasks at any time. Virtual machines can only be created after completion.
curl -L https://raw.githubusercontent.com/oneclickvirt/pve/main/scripts/install_macos_images.sh -o install_macos_images.sh && chmod +x install_macos_images.sh && bash install_macos_images.sh --lang=enOr
bash install_macos_images.sh --lang=enAfter the background download task starts, you can close the SSH window and wait for 30 minutes to 3 hours (depending on your server bandwidth and connectivity) to download the ISO 7z compressed package.
When the download task is complete and the current download task query shows empty, you can choose to execute the extraction task. The waiting time for extraction depends on your server's CPU performance.
When the extraction task is complete and the current extraction task query shows empty, all preparations are ready.
Tasks of the same type can run concurrently, and any task can be canceled at any time by entering the PID value.
Build from https://github.com/oneclickvirt/macos currently supported image compressed packages:
# Listed by system release date from old to new
high-sierra.iso.7z (Size: 5.23GB)
mojave.iso.7z (Size: 6.03GB)
catalina.iso.7z (Size: 8.33GB)
big‑sur.iso.7z (Size: 12.21GB)
monterey.iso.7z (Size: 12.36GB)
ventura.iso.7z (Size: 12.31GB)
sonoma.iso.7z (Size: 14.41GB)
sequoia.iso.7z (Size: 15.02GB)macOS Virtual Machine Template Setup
- Systems
high-sierra,mojave,catalinarequire at least 2 cores, 4G of RAM and 40G of hard disk to run. big-surand newer macOS versions require at least 6 cores, 6G RAM and 50G disk.- The newer the version of the system (the later the serial number of the download), the more hardware is required.
- All images are boot disk images without any personal data, so disk allocation, login information setup, and network settings need to be manually configured according to the instructions.
- You need to manually start the virtual machine from the web interface. Before starting, you can check if all templates meet your expectations.
Download Template Script
curl -L https://raw.githubusercontent.com/oneclickvirt/pve/main/scripts/buildvm_macos.sh -o buildvm_macos.sh && chmod +x buildvm_macos.shParameter Meanings
# ./buildvm_macos.sh VMID CPU_cores Memory Disk SSH_port VNC_port System Storage_disk Independent_IPV6(default_N_if_empty)TIP
The disk size here is only the size of the virtual machine's disk. During the actual setup process, the program will also mount the boot disk and system image, so the actual disk requirement for setting up a virtual machine is virtual machine disk size + image size + boot disk size (500MB). Always be aware of whether your disk space is sufficient for setting up virtual machines.
Example Command
Using the oldest version (high-sierra) as an example, the supported configuration is as follows (very laggy)
./buildvm_macos.sh 100 2 4096 45 44022 45901 high-sierra local NAfter the template is set up, you can run cat vm100 to view information, or check the NOTES in the corresponding VM in the WEB interface.
TIP
If you did not install PVE on Debian through this project, but installed PVE directly using the official ISO, and did not merge the local and local-lvm partitions, or the local partition is not enabled to support the VM disk type, then the local in the one-click command above should be changed to local-lvm, and you need to use a VM disk-supporting Partitioning for virtual machine creation
Here is the information for the example VM:
| Property | Value |
|---|---|
| VMID | 100 |
| CPU cores | 2 |
| Memory size | 4096MB |
| Disk size | 45G |
| SSH port | 44022 |
| VNC port | 45901 |
| System | high-sierra |
| Host storage disk | local |
| Independent IPv6 | N |
TIP
Note that VMID can only use numbers from 100 to 256, other numbers are not available
macOS System Boot and Installation
After completing the previous steps, you can see a gray virtual machine waiting to be started in the panel.
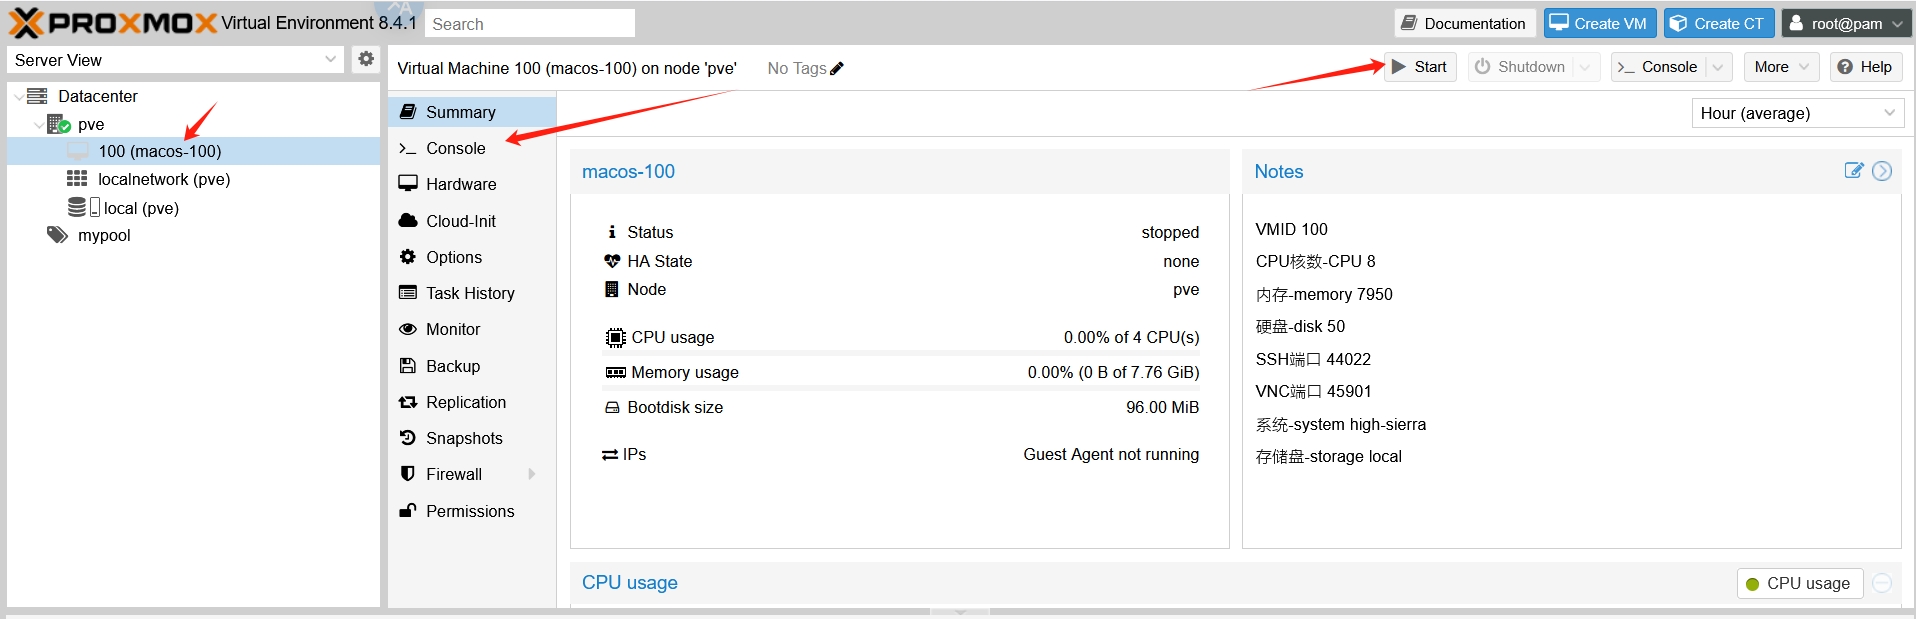
After clicking start, enter the VNC panel. The selection box on the left has a full-screen button. It is recommended to operate in full screen to avoid resolution issues.
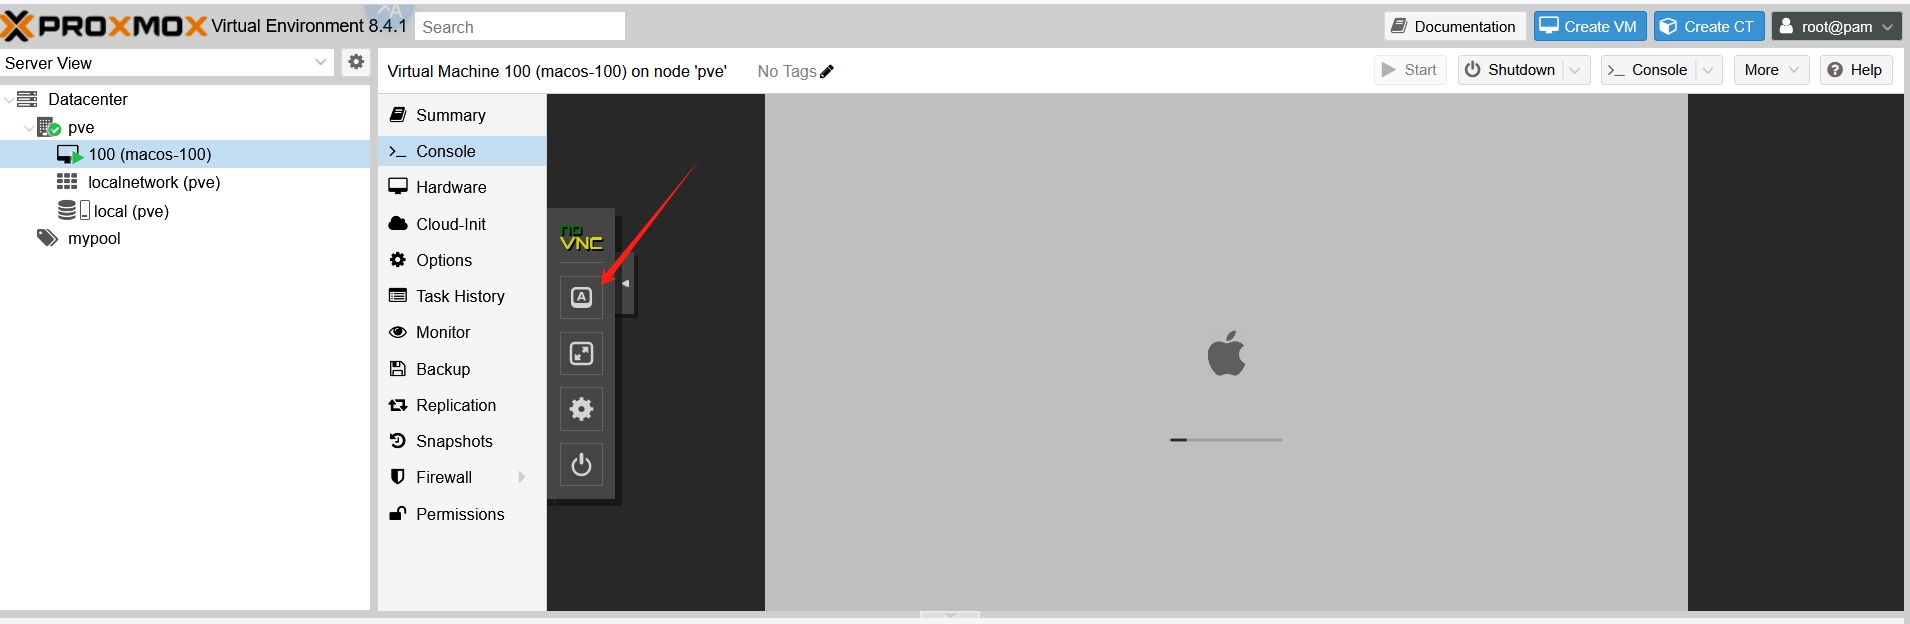
After about 3 minutes of boot disk loading, a startup disk will be displayed on the left center of the screen. Click directly or press Enter.
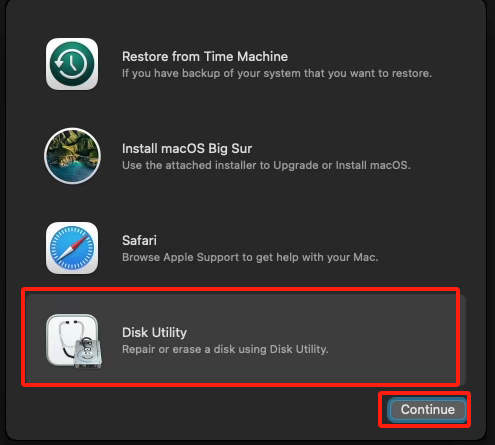
After another 3-5 minutes of startup disk loading, four selection boxes will appear. Select Disk Utility and click to enter.
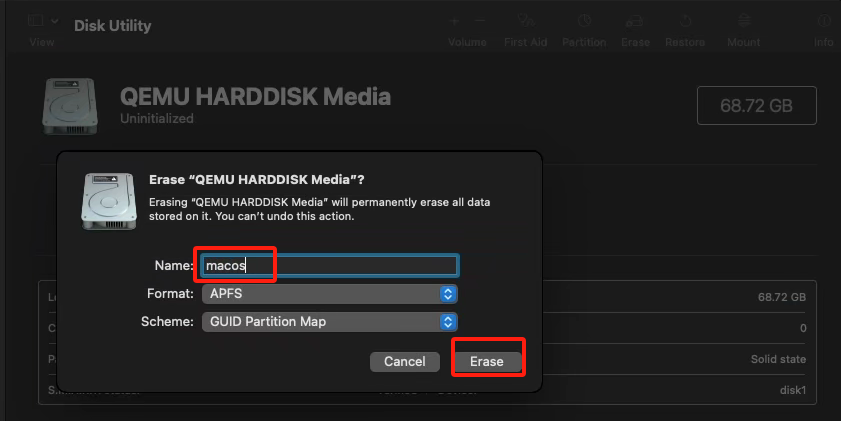
After entering, you can see three disks and one image. Find the disk larger than 40G named QEMU HARDDISK Media, and click Erase.
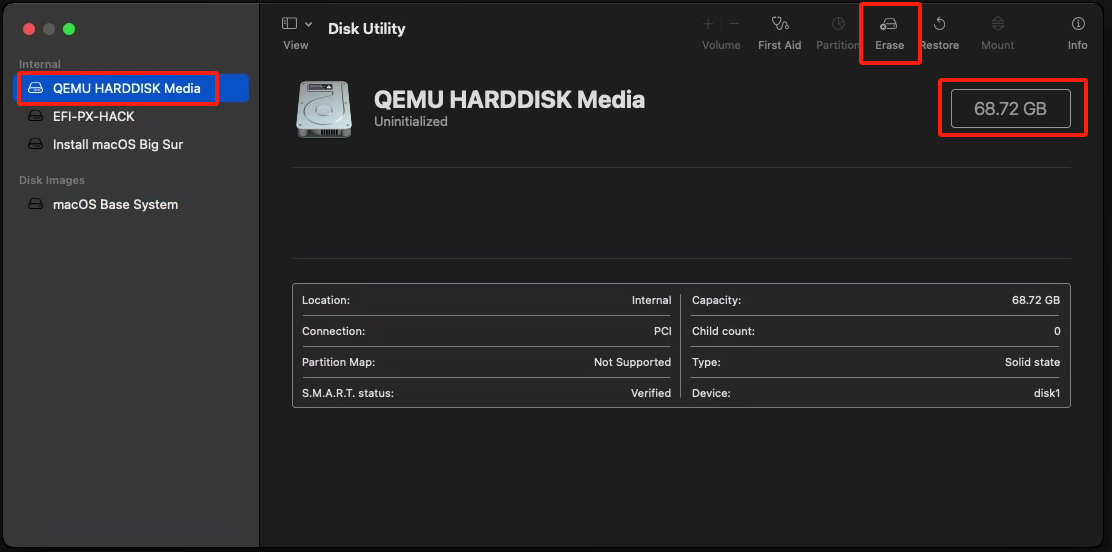
A pop-up window will appear, requiring you to rename the name to macos for easy identification and use later, then click Erase to continue initialization.
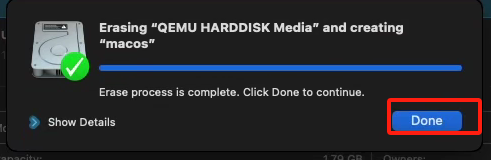
After initialization is complete, click Done.
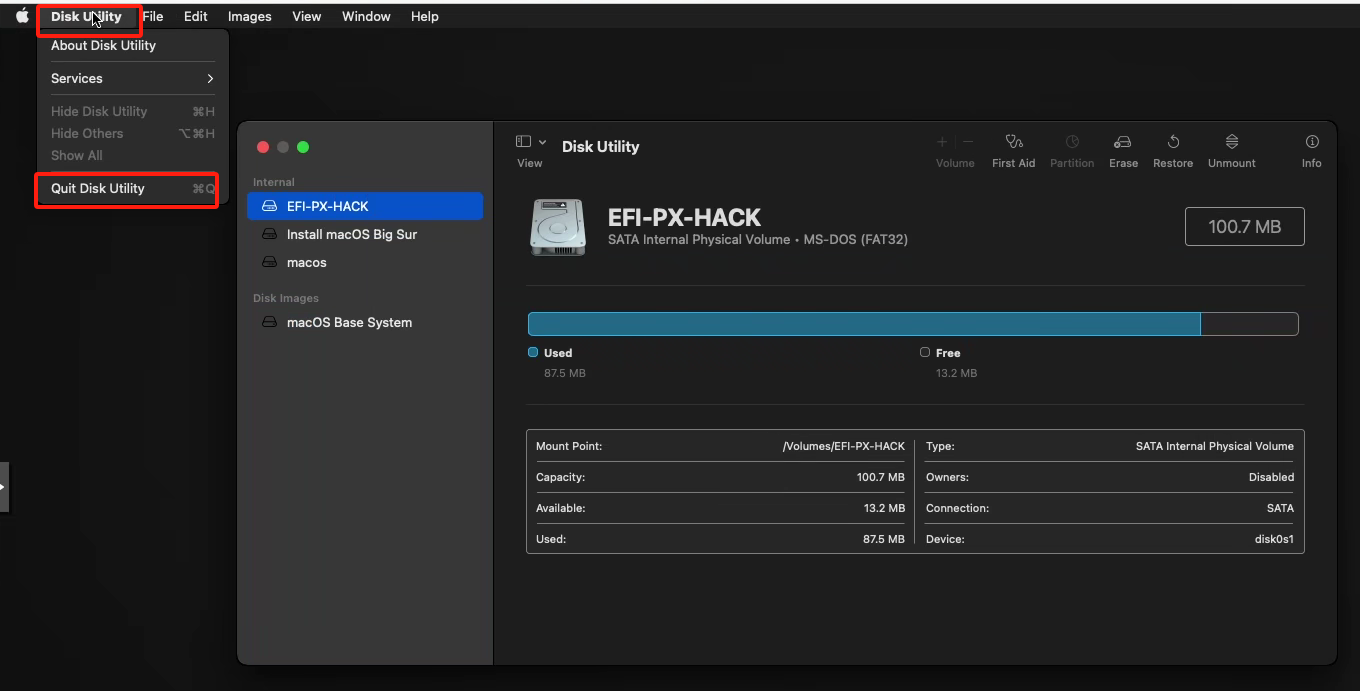
Now you need to exit the Disk Utility interface. Click Disk Utility in the upper right corner and select Quit Disk Utility to exit the current selection box.
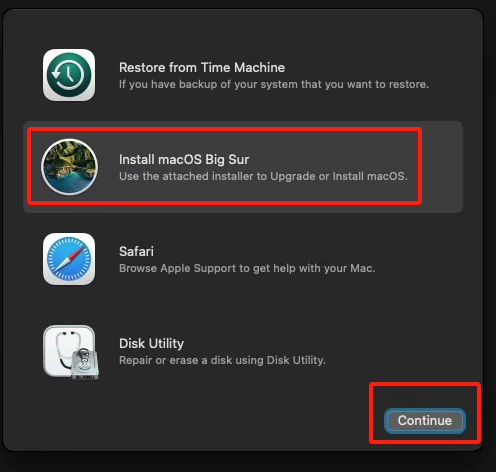
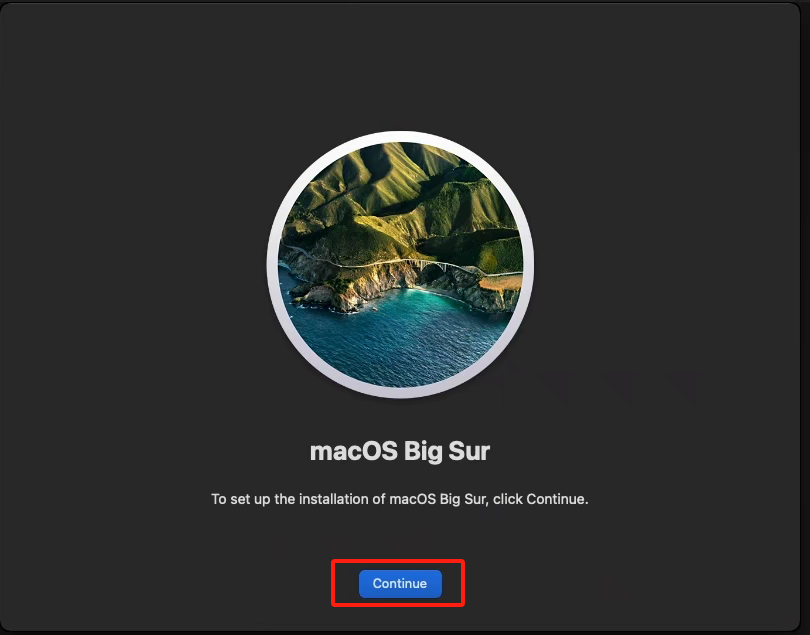
Then you return to the previous four selection boxes. Select Install macOS XXXX (since I am using Big Sur as an example, XXXX is Big Sur), and click continue.
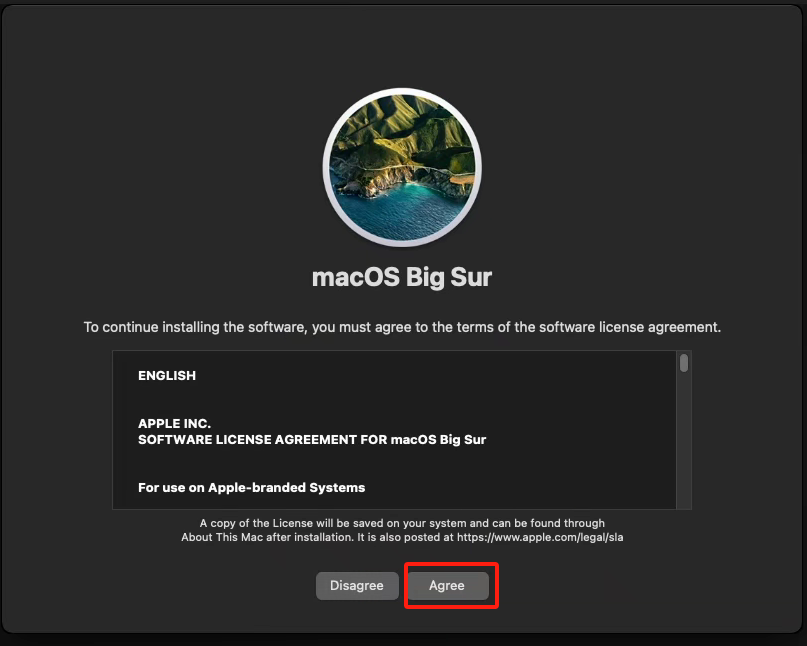
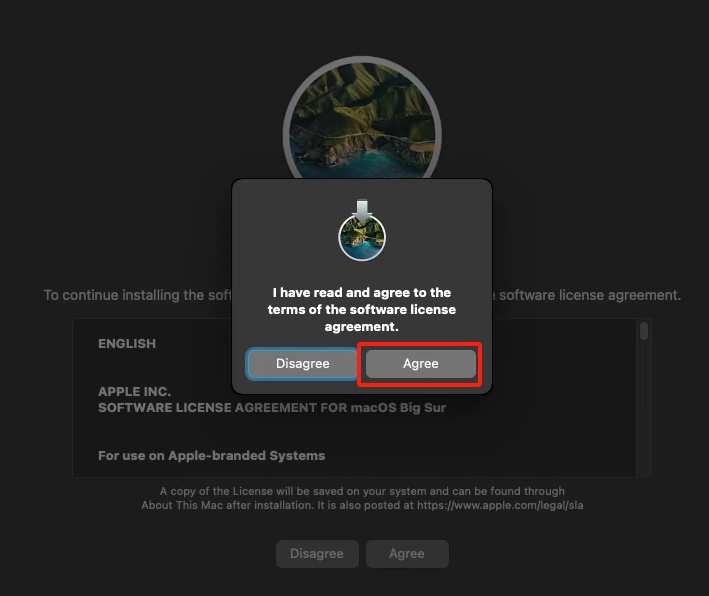
In the following steps, continue clicking continue, then click Agree, and then Agree again.
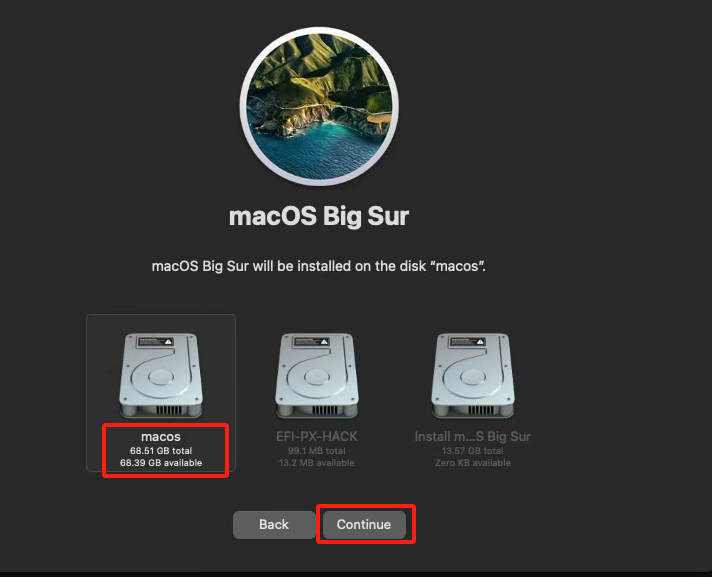
Until those three disks appear again, but here you can see the disk larger than 40G named macos. Select it and click continue.
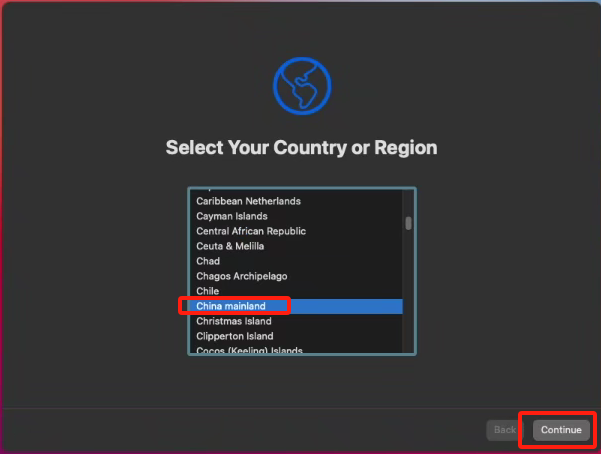
After a period of file copying and disk loading (about 12 minutes), you will formally enter the system installation phase. Choose your region based on where the host machine is located.
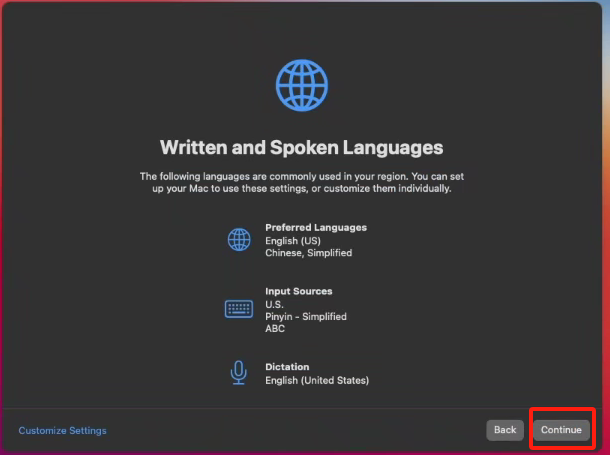
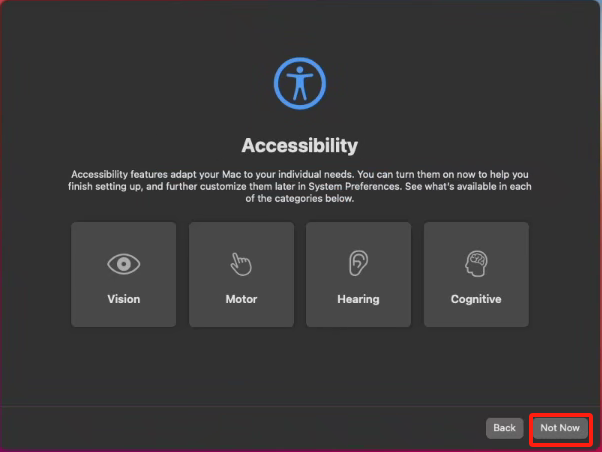
After selecting the region, continue clicking continue.
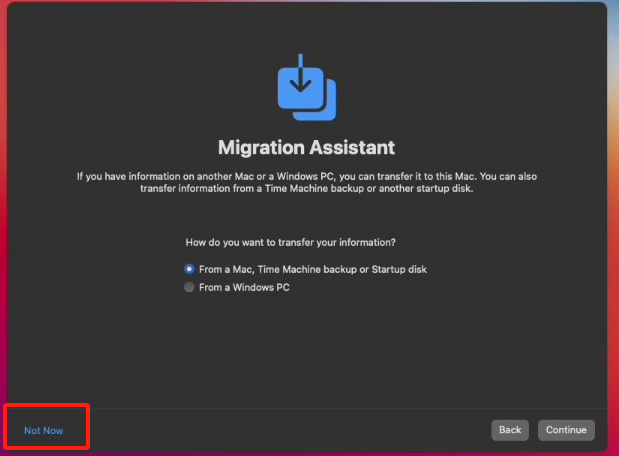
Until the Migration Assistant data migration option appears, select Not Now in the lower left corner to not import user data.
Then you will be prompted to create a user. Fill in the username, account name, and login password. After setting up, click continue.

After that, you will continue clicking continue until the system installation is complete.
Network Configuration
Since the system installation was performed in an offline environment, you need to manually configure a static network connection to the host's bridge.
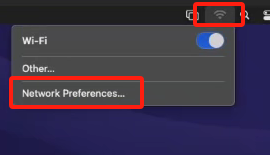
Click the WIFI button in the upper right corner, turn off WIFI, and then click Network Preferences ...
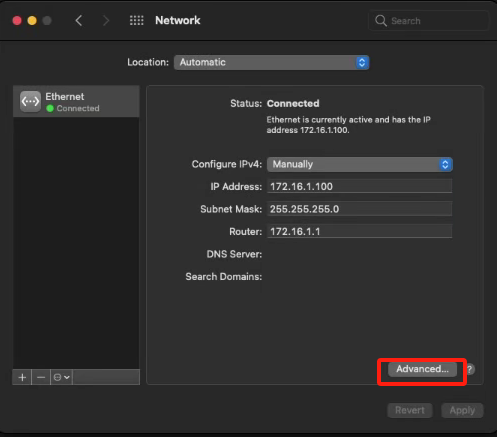
After entering the settings interface, click the Advanced button to enter the advanced settings interface.
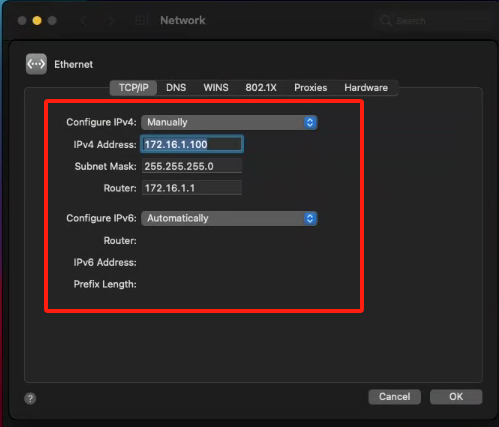
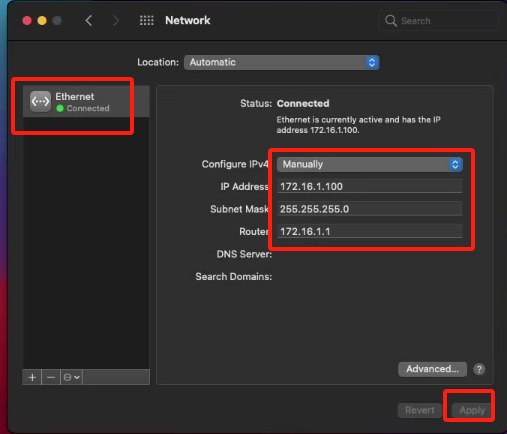
Fill in the static network configuration in the TCP/IP tab.
Configure IPv4: Manually
IPv4 Address: 172.16.1.xxx (replace xxx with the IP you want to bind, my vmid is 100, so I wrote 100 for convenience)
Subnet Mask: 255.255.255.0
Router: 172.16.1.1
If you need to configure an IPv6 network, similar to the IPv4 settings above, you will need to fill in the public IPv6 address bound to the virtual machine (written in the Note box in the PVE panel), subnet mask 128, and the default gateway obtained by executing cat /usr/local/bin/pve_check_ipv6 on the host.
Fill in the static network DNS configuration in the DNS tab.
Generally, adding 8.8.8.8 and 1.1.1.1 is sufficient. For use in mainland China, use 114.114.114.114.
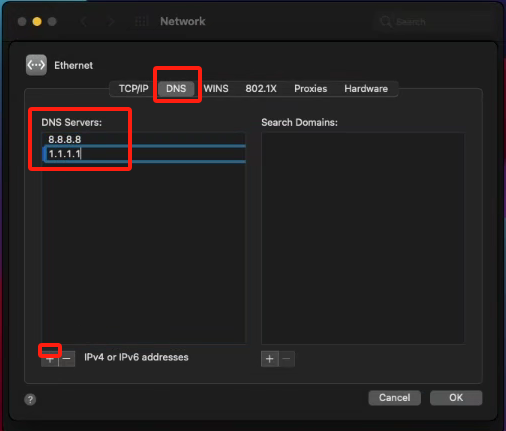
After filling in and applying, the top left of the settings will show that the network is connected.
Now, opening the default browser and visiting any website will allow you to access public network resources, proving that the network has worked.
Remove ISO
In Proxmox VE, open the VM Hardware tab, select the corresponding CD device, click Remove, then restart the VM.

For macOS VMs, remove opencore.iso and <installation-image>.iso, similar to how Windows examples remove installer/driver ISO devices.